Showing posts with label tips and tricks. Show all posts

 Happy Saturday, guys!

This week seems to have flown by.  Last Friday was my baby's first birthday, and we've had friends and family staying with up until today.  Whew!  I really enjoy hosting people but I always feel like lose contact with the outside world when I do.  Maybe that's just the sign of a good visit. :)

The Bean's first birthday was...eventful.  We had far fewer people than we anticipated, so we had
LOTS of food.  We also had planned to have it outdoors at a nearby lake, and I had all of these games, decorations and plans for the tables and two marquees.  What I didn't expect was gale force winds when we got there - lol.  The best laid plans of mice and moms...

The truth is, I've never had an event that has gone exactly the way I wanted it to.  Food has burned or fallen; weather hasn't cooperated; decorations, outfits, arrangements, crafts haven't turned out properly and had to be scrapped last minute, my loving husband has put a stake through his foot the day of... basically, anything that could go wrong, has.  So, when something goes pear-shaped, what's a girl to do?

EG's 6 Tips for Dealing with Event Fails

1. Give yourself a minute to be frustrated, then regroup and move on.  Although I'm not in most things, I'm very type A when it comes to entertaining.  I put a lot of thought and effort into preparations and I want everything to be perfect.   But, when the proverbial poo does hit the fan (thankfully that has yet to be an actual problem at one of my events), I take a minute to let myself get frustrated or annoyed, I vent about it to someone that I'm close to (yay, good friends!) and then I do my best to let it go and work with the circumstances. 

2.  Prioritize - truthfully and practically.  Yeah, sure, you can say "that everyone has a great time" is the top priority.  But practically speaking, what do you feel brings about those results?  Is it a killer decor?  Lots of food?  Really impressive food?  Music?  Games?  A good space to sit and chat?  Once you've figured that out, focus on making those top pieces happen and let the others go.

For the Bee's party, the wind was the major issue.  It meant that I couldn't put up the marquees or the decorations.  This was tremendously frustrating as I'd spent time on them.  But the truth was, they weren't really important.  Instead, feeding the guests was far more essential to me.  So, the main task became trying to get the food out and anchored. 

3.  Recruit backup.  I tend to be a flying-solo kinda gal when it comes to planning and executing a party (at least for the big stuff).  But even I know my limits.  Forget your pride and obsessive-compulsive tendencies, and grab a friend to help you get things back on track.

After about an hour at A's birthday party, the wind was, if anything, worse.  I absolutely hated to do it, but I finally made the call to pack everything up and move the party back to my apartment.  My amazing best friend, husband and family cheerfully hauled platters of sandwiches, presents and unused decorations to their cars for transport.  And when we got home?  They just as cheerfully bustled around with me making my apartment pink and froofy for the birthday girl (who thought the whole day was just grand!).


4.  Remember that most guests won't know the difference.  So, you painstakingly made a gorgeous cake sure to wow the masses and then proceeded to drop it on the floor twenty minutes before the party.  After a few creative expletives, have a friend grab some store bought cupcakes and do your best to forget it.  The guests can't miss what they didn't know was coming.

5. Work with it.  Some of the best event details I've seen have come from people making the most of something gone wrong.

When a special effect intended for our bathroom didn't come together well one Halloween, I scrapped it last minute.  Instead, I anchored two black lights, threw a highlighter in the tank of my toilet, and added left over glow sticks to every surface.  I was super bummed at my half-hearted decor, but it wound up being the hit of the party and people had a blast getting pictures in there all night  (because, who DOESN'T want a picture in the loo...?). 

One of the cutest wedding shoots I've seen occurred when it happened to pour on the big day and the bride and groom grabbed an umbrella, borrowed some sneakers and went for a jaunt in the puddles. 

Girl scout cookies out of girl scouts, my friends.

6.   Laugh about it.  Sometimes there's just no way around it - things just bombed.  But epic fails make great stories and life is far too ridiculous not to laugh at.  

The Bee's birthday didn't quite turn out the way I'd dreamt, but it certainly was memorable.  And, hey, on the upside, the bar for her second birthday has been set comfortably low!


I'd love to hear from you!  Do you have any amazing party failures?  How did you handle it at the time?  Is there anything you wish you'd done differently or advice that you can offer? 

Have a fab week guys!  Happy planning!

Party Tip #317: as long as a party includes cupcakes, it's a success.


Most of us have, at one point or another, attempted to decorate around something.  Sometimes it's an architectural feature like a window or a radiator or a set of stairs.  Sometimes it's an inspirational decorative piece like a boldly patterned pillow or a beautiful print or a unique lamp.  And sometimes it's a bad-ass children's car.  Anybody?  Perhaps some backstory is needed...

This past Christmas, my husband's parents bought our daughter her first car.  It's a truly phenomenal Rolls Royce (or, as it's written in Engrish, Rlaos-Lais.  Not making that up.) that is not only driveable for the munchkin when she gets a little older, but also remote controlled so that mom and dad can motor her around as well.  This thing has trunk space, a horn, a radio, an mp3 jack, color changing headlights and a rechargeable battery.  I wouldn't be surprised if somewhere down the road we discover it has airbags and a Lojack system. Add to that the fact that it's all creams and blacks and shiny chrome (with a "quilted" merlot interior), and you'll come to the same conclusion I did: this car is far too fabulous to keep out of sight (Plus the Scrunchkin loves to pull herself up on it and dance to the music.  How can I deny that?).

So suddenly, I found myself with a large toy (albeit an exceedingly cool one) to decorate around (please tell me I'm not the only one who's ever done this...!).

How cool is this car?! How cute is this kid?!!

The only place the car fits is at the bottom of the stairs, next to the narrow wall of the closet.  The car is obviously small and low (which is a shame 'cause I would TOTALLY ride this bad boy around if I wasn't terrified I'd get stuck in it) and leaves a lot of real estate on the wall above. After considering several options, I decided that it was the perfect spot for a small gallery wall.

I wanted to tie the car into the decor while keeping the look classy (after all, it is a Rlaos-Lais), so I set out to find some vintage car related decor.  Not an easy task.  There are plenty of things you can buy, however not at a price I was willing to pay (particularly considering I have no idea if I'll continue to have an auto zone in my living room if and when we move into a house).  The search was beginning to get frustrating.

But then I found it.  (I would have gone streaking down the street yelling Eureka if I wasn't afraid of frostbite.  And blinding the neighbors.)  As it turns out, the New York Public Library has a digital art collectionThousands of incredible images FREE for download! (They only request you use it for personal use only.)  The site is searchable, has popular categories, and even offers different size options depending on the picture.

I found the coolest automobile related art.  I wound up printing a few different options before settling on what I wanted.  I chose two pieces: the first is the cover from sheet music circa 1900.  The song is called "My Automobile Girl."  How perfect is that?!

http://digitalcollections.nypl.org/items/510d47df-edfc-a3d9-e040-e00a18064a99


The second is from an automobile manufacturers catalog and features an early 1900s car called The American Gadabout.  I like the image so much that I may have it blown up even further and reframed somewhere down the road.  (Quick tip: you can have pictures printed in poster sizes at Staples super cheaply and super quickly!).  It has such a fun and industrial look about it, it reminds me of something you'd find framed at Pottery Barn or Restoration Hardware.  Love!

http://digitalcollections.nypl.org/items/510d47dd-fffc-a3d9-e040-e00a18064a99

 After printing out the images, I found some unused frames and spray painted them black (far cheaper than buying new!).  I cut poster board to size and mounted the pictures directly on them before inserting them into the frames.  Once they're under glass, it's REALLY hard to tell that it's not an actual matte.  Perfect!


The wall needed some curves, so I added an over-sized cream and black clock, and finished the whole thing with a few framed post cards from our former home, Los Angeles.  Done!


I have been toying with the idea of mounting our old license plate or adding marquee letters or a cute vintage garage sign, but for now, I'm pleased with how it's shaping up.


 The only bad part in all this is that I'm now slightly addicted to the digital library.  I have downloaded a ridiculous amount of art that I'd like to have framed and hung.  Where?  No idea.  But it's too cool to pass up!

Alright, I'm off to finish up a few more things!  I'm working on another High/Low project that I'm really excited to show you and will hopefully have ready for next week.  Have an awesome week!  If you wind up printing and using any of the digital art, post a picture in the comments - I'd love to see it!


A couple of months ago, I came across Armour Etch - a product designed for glass etching.  Intrigued, I did some research on it - looking up products, tutorials and reviews - and finally bought some to try.  In Amazon's splendid Patience-Is-Overrated style, a small, brown, cheerful looking package containing the Armour Etch arrived on my doorstep two days later.  I brought it in and set it on my counter, eager to make all of the gorgeous projects I was dreaming up.  And there, on the oh-so-swanky laminate countertop (try not to be jealous), it sat -unopened and untouched.

Source
The truth is, as excited as I was to try it, I also had this fear of getting myself into some difficult, twenty step process where I waste copious amounts of time and ultimately chemically burn my eyebrows off.  Silly me. 

A week ago, I finally decided to have a go at it.  And boy, was it easy. 

I purchased some cute glasses at the Dollar Tree, figuring if I ruined them it wouldn't be the end of the world (and, in fact, I did ruin one of them. More on that later). 

Raiding my craft supplies, I found various letter and number stickers as well as some label shapes.  I also grabbed a few small brushes, painters tape, disposable gloves and some damp paper towels.  I put down a piece of my crafting foam core to protect my work surface.


I've been wanting to replace the cotton jars in my bathroom for a while, so with that in mind, I decided to start with an apothecary style numbering. 

My old jars were fine, but I wanted something with cleaner lines.

I gave the glasses a good clean and wipe down with alcohol to prep the area and make sure that the stickers adhered properly.  

Laying out the stickers was probably the hardest part of the project, simply because it's difficult to determine when they're straight. The good part is, that it's also pretty hard to determine if they're NOT straight once you're done (so there weren't any that I felt looked completely wonky). 

Because I needed the negative space from some of the labels (to make the interior oval), I actually used the sticker backing around the actual label sticker. 

For the first glass, I also used painter's tape to protect the areas I didn't want etched, however, on following glasses I just made sure I applied the etching cream very carefully.


After my stickers were in place, I shook the begeesus out of the bottle and then put on disposable gloves before opening it (very important! This product could potentially cause chemical burns!).   

The etching cream is thick and goopy and kind of reminded me of Elmer's Glue.  Very Smelly Elmer's Glue (make sure you work in a well ventilated area).  Using a foam brush, I carefully applied a thick even layer over the area I wanted etched and allowed it to do it's magic. 


 It's magic was impressively fast - it only needed to sit on the glass for one minute.  To be honest, I questioned whether or not it would really be done in that amount of time, but it definitely was!  With my gloves still on, I rinsed the product and stickers off with warm running tap water. 

And, much to my amazement, that was it! I had cute little etched apothecary glasses in less than ten minutes!  I stole the lids from the jars I was replacing and added them to the new ones, and they were ready to go!


The project turned out so well, I decided to play around and try some other designs. 

Armour Etch's instructions mentioned that the product was not intended for use over larger areas.  As that was a little vague for my taste, I decided to see what would happen if I attempted to etch an entire glass, leaving a monogram in the center.  Conclusion? Armour Etch is not intended for larger areas (If only they'd tell you these things). 

Because it's impossible to make sure that the product is completely even and left on for the exact same amount of time, the etching comes out looking spotty and messy.  With smaller sections it's hardly noticeable, but with a larger area, it kinda looks like Frozen Queen Elsa's kindergarten project went terribly awry. 

With my fountain of knowledge and terribly clever new-found skill (Okay "skill" might be a bit of a stretch...) I used the final glass container to make a small monogrammed vase. 


My mom, loving the effect, brought over some pink water glasses (also purchased from the Dollar Tree) and we monogrammed those as well.  Tres Chic!
 
Monograms instantly add a touch of class. 
Like I said, this project truly couldn't be easier.  Letters, words, designs... I'm definitely going to be playing more with this in the future.  Personalized items will make great inexpensive but thoughtful gifts come the holidays and the price for the product is great considering how long it will last! 


A few additional notes: 

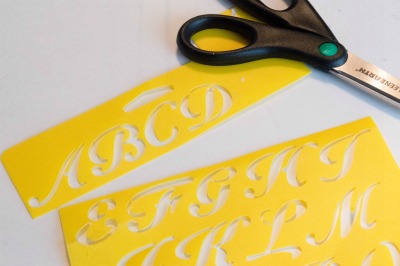
- Several people recommended trying a stencil and stencil adhesive for reusable letters.  I purchased
all of the necessary tools and found that even thin plastic stencils were a bit too thick for the adhesive.  Martha Stewart does make thinner cardboard stencils, but as they need to be washed off water, they still aren't reusable. To me, stickers make more sense. 

- Printable adhesive paper is another option for creating stencils.  They give you the option of creating any design you like, so long as you don't mind some fancy cutting!


If I'm allowed to toot my own horn for a minute, I'm pretty darn awesome at finding good stuff on Craigslist (toot toot!).  I know the places to look, I know how to negotiate, I know what things are truly worth and I know how to be safe about it.  Furthermore, I'm pretty darn awesome at knowing the right questions to get the best furniture... err, well, usually.  Alas, sometimes I miss something.

In the case of my gorgeous nursery dresser, I missed a pretty major question in the negotiation process.  "Does it come from a smoke free home?"  Yeah. Oops.

So, I found myself with a piece of wood furniture that I planned to put my baby on...that smelled like nicotine.  Not cool.

Luckily, there are ways to get smoke/pet/food odors out of furniture.  These handy tricks are good to know if, like me, you enjoy recycling and up-cycling old furnishings (and occasionally your brain goes on vacation during the discovery process...)

Bad Smell Killers


#1. Baking Soda
Yes, the does-it-all kitchen staple does this too.  Fill a small bowl or cup with baking soda and place in each drawer.  Close the drawers and leave it there for 1-2 weeks.

#2.  Furniture Cleaner with Orange Oil 
After using the baking soda, give the entire piece a good wipe down with citrus based furniture cleaner.  Orange oil is comprised almost entirely of limonene, which is not only highly scented, but also a very effective solvent.


#3.  Sunshine!  
If possible, set your furniture outside on a sunny, low humidity day (Amazingly, sticking it out in the rain will not do you any favors...).  Open all of the drawers and allow the sun to bake the piece for a few hours.  The sun will kill off any mold or mildew that may be adding to the problem and the air circulation will help air out the porous material. 


#4. Shellac That Puppy
If your furniture STILL has an odor, shellac can be used to seal the wood and squelch the smells.


#5.  Sachets & Scented Drawer Liners 
When the smell is gone (or all but), add sachets or scented drawer liners for a much prettier scent.  Cedar blocks also have a wonderfully woodsy smell and keep moths away.


For my dresser, I was amazed at how well the baking soda and orange oil worked (I may not have even needed the orange oil, but I figured a good cleaning couldn't hurt anyway).  I did wind up adding mildly scented drawer liners, but that was mostly because they were gorgeous!


I'm not likely to forget to ask that question again, but it's good to know there are solutions if I do!

Do you have any nifty tricks for getting rid of unwanted smells in furniture?


All Boxed In 

I think Amazon might be waging a war on trees.  I love Amazon - don't get me wrong.  But the amount of packaging and size of the boxes they use to send things always baffles me.  I often wonder if there isn't just a fulfillment room full of disenchanted gnomes somewhere who shake their fists at forests and laugh maniacally as they use an 18x20 cardboard box to send a package of pacifiers. 

Lately, we seem to have accumulated a rather significant number of Amazon boxes, due to the fact that we used that site for our baby registry.  Being the insane person I am, I started looking at packaging and going "Rather than just throwing them out, what could I DO with these?"  As it turns out, they were the perfect solution to another problem I was having.


Underneath the crib we have in our still-in-progress nursery is a little slip of space that's about 4 1/2 inches high.  As our nursery is already rather small, it's important to utilize every square inch for storage, and this little slot could be perfectly useful except that nearly all under-bed storage options are way too tall for the incredibly narrow space.  As it turns out, some of the Amazon boxes are perfectly sized to slide underneath - which is awesome - except they're not exactly attractive, and the crib skirt doesn't cover them.


Which is when I decided to turn them into something much prettier and totally useful.

DIY Fabric Storage Boxes


You'll need:

Cardboard box
2-3 yards of fabric
Foam Core
Spray Adhesive and/or Craft Glue
Fabric Scissors
Craft Knife
Pencils/Fabric Marker
Iron

Optional:
Grommet Kit
Rope

The Process:
*Check out the handy dandy diagram at the bottom for clarification on locations


1.  Carefully cut off the box flaps.


2.  Cut a long strip of fabric to cover the outside and inside of one wall, leaving an inch or two of overlap on all sides.  Repeat for the opposite wall.  Use spray adhesive to attach fabric, smoothing as you go.  Adhere overlap fabric to inside and outside bottom of box.  For example: For the A Sides, I cut a piece of fabric that was 8 inches high and 22-24 inches long. 


3.  Measure and cut one additional piece of fabric to cover the outside bottom of box, and outside and inside of each remaining sides, with 2 inches of overlap on all sides.  For example:  To cover the bottom outside of the box (C - not shown) and the outside and inside of sides B, I cut a piece of fabric that was 19 inches wide and 40 inches long. 


4.  Fold two inches on each of the long sides in toward the center and iron to create a crease.  The idea is to make a long piece of fabric with neat edges that will perfectly cover the bottom of the box.  For example: On my box, I folded and ironed 2 inches from each of the A Sides to create a perfectly even and "hemmed" 15" wide piece of fabric.  The 40" do not need ironed and the ends can remain unfinished. 


5.  Spray the bottom of the box with adhesive and carefully center the fabric, smoothing as you work your way outward (**Make sure the ends are centered as well!).  Continue gluing the fabric to the outside & inside of each side and, finally, to the bottom of the inside.  When finished, the bottom and all sides should be covered with fabric.  The cardboard and unfinished edges of the fabric will still be visible on the inside bottom of the box. 


6.  Measure and cut a piece of foam core to fit snugly inside the fabric covered box.  Measure and cut a piece of coordinating fabric to cover one side of the foam core with an inch or two of overlap on all sides.  Attach fabric to foam core, smoothing as you go and affixing the overlap to the opposite side.


7.  Slip the fabric covered insert into the box to cover all unfinished edges.  Woot! You have a fabric covered box!


Gettin' Fancy: 

Grommets: Attach grommets to each side of the box, according to grommet kit instructions (See how I totally dodged creating my own instructions there? Trust me, theirs are better.)  (Okay, okay. I'll include some basics and some pics just so you have an idea of how easy it is...)


Grommet basics (but seriously, follow the instructions on the package...)


1. Measure and mark your grommet location  2. Use scissors/craft knife to create a hole big enough for the grommet to fit through. 3. Slide grommet through hole in box and fabric  4. Place washer on the opposite side of the grommet (don't worry if it doesn't look pretty - it will!)  5.  Center grommet on anvil and insert flaring tool into washer.  Hammer until fastened together (It's quite fun!)  6. Admire your handiwork.  Man, are you awesome.


Handles:  Slide rope through grommets and knot on the inside to create handles. Tough stuff, I know.


Sliders and Such:  Add self-adhesive sliders for ease of use, or bookplate labels to mark your shtuff.

That's it!

I have to say, I LOVE how mine turned out. I did three coordinating bins and they fit perfectly under the crib.  I love that they add to the decor rather than taking away from it - all while giving me extra storage for clothes, toys and supplies.  I'm also kinda thrilled with the cost.  I had most of the supplies on hand and only spent about $9 total on some additional fabric from Walmart.  (PB Teen has similar storage boxes for almost $30 each). And I was able to create the exact size and shape I wanted!

I'm definitely going to make a few more of these for other places in the house when I have time!  It's kind of nice thinking I'm fighting the good fight against those Amazon.com tree-hating fulfillment gnomes out there.  I mean, what nobler cause is there?

Planning to try this project?  I'd love to see pics on how yours turn out!!  I'm always looking for additional inspiration!


Generally, I'm all for baking things from scratch.  Things taste better, they're healthier (no preservatives!) and there's nothing like the smell of fresh-from-the-oven carbohydrates (mmm, carbs...).  And truth be told, if I were a true Martha Stewart-ite I would probably have a coronary at the idea of using a boxed mix.  Alas, my legion of minions seem to have taken their leave, my money is currently tied up with a prince from Nigeria (who is totally gonna make sure that I get it back with significant interest), and at the end of the day I have less energy than my cat on catnip so boxed mixes are occasionally employed.

When it comes to corn muffins, I tend to fill my cart with Jiffy brand, frankly because they're super cheap.  The problem is, if you make Jiffy corn muffins according to the instructions on the back, they're kinda blah and incredibly DRY.

After a little research and playing around a bit, I found that with a few quick additions, you can improve the outcome significantly and get moist, sweet muffins - perfect sides for almost anything.

Basic Ingredients: 
Jiffy Boxed Mix
1 Egg
1/3 c. Milk
1/3 c. Sour Cream
2 tsp. Kosher Salt
2 Tbsp. Honey

Potential Additions (based on your personal taste):
2 tsp. Cholula Green Pepper Hot Sauce or Tabasco
1/2 c. Corn
2-3 Tbsp. Shredded Cheese 
1 Tbsp. Chili Powder 
Chopped Jalepenos 
Get Crazy and Pick Your Own!! 

Let's Do This: 

1. Preheat oven to 400 degrees
2. Mix all ingredients
3. Spoon into greased or papered muffin tins
4. Bake 15 - 20 minutes or until tops begin to brown.


The hands-on process takes MAYBE ten minutes, and the baking time allows you a chance to kick off those shoes and heat up some soup or Mouthwatering Chili. 


Last week I started an experiment.  I wanted to see which, of all of the internet's This-Will-Make-Your-Cut-Flowers-Last-Longer additives really worked, and which delivered the best results.  The contenders were the six most common preservative recommendations I could find: Aspirin, Apple Cider Vinegar, Bleach, a Penny, Vodka, and Soda.  I also tested grocery store flower food and used plain water as the control. 

The results? Somewhat surprising actually!  Below the countdown, from worst to best, along with the pics and particulars.  So with no further ado...

8.  Copper Penny & Sugar 
At least it looks ashamed of its failings
Observations: By Day 3, when I changed the water, the Penny Rose was feeling a little soft. It hadn't opened much more, but it already had a few rolling edges and darkening spots.  By Day 5, the Penny Rose had bit the dust. I attempted to leave it one or two more days (I was hoping they all could last at least a week) but on Day 6, when I went to move it, the entire head fell off.  If this truly WAS a competition, perhaps the Penny could enter as The Decapitator.

 Additional Thoughts: I have to say, I didn't have a lot of hope for this one from the beginning.  I have in the past tried adding a penny to arrangements and never noticed any difference.  But on the upside, of all of the roses that died, at least it has some coinage to pay the Ferry-Man to navigate the river Styx.  Always a silver lining.

The Copper Penny & Sugar Additives weren't enough to keep the rose looking good. 
7. Apple Cider Vinegar & Sugar
Observations: The Vinegar Rose didn't look terrible by the end, but by Day 3 the bloom hadn't opened at all, and felt extremely soft.  By Day 5, it looked dark, spotty and withered and by Day 6 fell apart completely.  In addition, the vinegar made the water a bit yellowish (not reminiscent of anything good), and the distinct smell lingered in the room, even after several days.  

Additional Thoughts: I love me some vinegar. It does amazing things when used in cleaning and cooking.  But when someone tells you to "Stop and smell the roses", they don't usually follow it up with "Because, Sweet Moses, they smell like a salad."


Apple Cider Vinegar, though wonderful for a lot of things, is NOT something I'll be using again for my flowers.

6. Aspirin
Observations:  As I mentioned this last week, one of the things I didn't like was how cloudy the Aspirin made the water.  I had hoped that might clear up, and to some degree it did, but there was still a white silt on the bottom of the glass for the whole week.  As to the flower, it did open slightly, but the bloom felt soft by Day 3 and lost the majority of its petals by Day 5 and 6.

Additional Thoughts: This one surprised me.  I've heard a lot of people say to use Aspirin over the years, and I thought for sure it would be one of the final contestants.  To be honest, I actually debated whether or not it should be swapped with the Vinegar.  The petals - though opened slightly- looked wilted and rolled by Day 3 and 4, however the fact that it didn't smell or look like the water had been *ahem* used gave it a slight advantage.

Aspirin Rose

5. Grocery Store Flower Food 
Observations: The bloom on the Flower Food Rose didn't open much, but it did stay looking nice through Day 3 and Day 4.  By Day 5 it still looked okay, bu the petals were starting to roll and darken a bit and the head felt softer.  Day 6, the rose had started to droop and lose petals.  

Additional Thoughts: The flower food dissolved well in the water and though maybe not completely clear it wouldn't be noticeable for the most part.  In addition, the color of this rose stayed very vibrant.  I don't know if there was just something different about the rose itself, or if it was in fact the flower food, but I thought it was worth mentioning.  By Day 6 the rose HAD started to smell a bit like a - well- decaying rose.  But hey, I start to smell after two days really, so I figured 6 days was pretty darn good.  


The Flower Food Rose
 3./4.  Bleach & Sugar 
Observations: The Bleach Rose had opened nicely by Day 3.  Day 5 showed some wilting on the outer petals (which could be removed in ordinary circumstances), but it still held its shape well.  The bloom was soft though, and by Day 6, one or two petals were starting to make their escape.  

Additional Thoughts: At the start, I had thought that this one might go the distance, and it did hold up pretty nicely.  The bleach smell dissipated almost immediately (or, potentially, was just overwhelmed by the vinegar smell).  I almost gave this one a hard third place, but considering it lost some of its petals by Day 6, I felt it was only fair to call it a tie with... 


The bleach in the water keeps away bacteria, while the sugar acts as food to the Rose. Apparently carbs aren't an issue for it.

3. Water  
Observations: Days 3 AND 5 had the rose looking more open.  It remained firm through Day 5, and though on Days 6 and 7 it had started to soften a bit and take on that decaying rose smell, it did not lose any petals.  

Additional Thoughs: BWAAAAH?!  This one really blew my mind.  I actually never intended to even give it a rank as it was the control, but darn it it looked so pretty I felt it deserved it.  


Water Rose
 2.  Sprite Rose 
 Observations:  The Sprite Rose opened at a slower place than the Water Rose, but that also meant that it stayed looking nice longer. Day 3, 4 and 5 the rose stayed firm and only by Day 6 did the bloom start feeling soft.  Day 7, I still think it would have looked decent in an arrangement. 

Additional Thoughts: This was another surprise to me.  I mean I like Sprite, but who'd-a-thunk flowers do too?  

Sprite Rose
 
And Finally (Drum roll please)...

1. Vodka & Sugar 
Day 7 and it looks beautiful!
Observations: The Vodka Rose had a more pronounced opening than the Sprite Rose, but less immediate than the Water Rose.  It stayed firm through Day 6 and didn't show much darkening or curling at the petal edges.  The color also seemed to keep well. 

Additional Thoughts:  Oh Rose - you lush.   The Vodka Rose looked great a week in - to the point that I wouldn't worry about using it in an arrangement.  None of the petals dropped and the color looks almost better than it did in the beginning (perhaps there's truth to getting Rosy in the Face when you've been drinking!).  The water stayed nice and clear and the smell of decay wasn't as noticeable a week later.  So if you've got some vodka floating around in your house, grab some flowers and get yo' shine on!  ("One for the rose, one for me...")
The Vodka Rose stayed firm and vibrant through the end of the experiment. Would were we all.

 Final Thoughts and Caveats: 
To be a fair experiment, the test really should be done multiple times OR with multiple roses in each glass. I may redo the procedure at some point to see what the outcome is.  
This experiment also didn't include various breeds of roses or even colors, which could, potentially alter the conclusions.  

Ultimately? If you have something that you swear is working for you... Why change?  

On the other hand, if you're out there looking for a good reason to make a mixed drink - just blame it on the roses. (Although I will say, this really only works if you actually HAVE flowers in the house. It's a tougher sell otherwise.)

Stay Rosy, friends!

 
Powered by Blogger.