Showing posts with label my house. Show all posts

Just over a year ago, when I was looking around for finish touches for the nursery, my mom suggested I get a growth chart to mark Annie's progress as she grew.  I loved the idea and went on a hunt to find the perfect one. Despite my best efforts, I came up short - underwhelmed by the selection and quality. 

That's when my DIY brain kicked in and said, "if you can't find it, make it." 

Over the past few months, I sketched out a bunch of ideas and finally settled on one that fit my daughter's Parisian themed room: A glittering Eiffel Tower with colorful, old-world hot air balloons, set against a sunset sky and the words "Up, Up & Away" on a scroll beneath. 

Dreaming it up and sketching it turned out to be much easier than actually creating it. 

The first step was to purchase a roll of painters canvas that was already primed.  The effort of doing so completely exhausted me and I had to leave the canvas rolled up in its packaging for months on end while I recuperated.  Or, I suppose there is the slightest chance I was simply overwhelmed by the project and procrastinating like a champ.   

Finally, as the scrunchkin's birthday drew near (and I couldn't take the roll of canvas staring accusingly at me every time I passed it...), I heaved a sigh, collected supplies and broke the process down, step by step. 

I knew I wanted to mount the chart about 1 foot off of the ground and for it to measure up to 5 feet with a few extra inches at the top.  I also had to allow 1 extra inch on each side for hemming and 2 inches on the top and bottom.  After measuring 20 times to make sure I wasn't screwing it up, I cut a length of material 4' 10".  (The width didn't matter so much to me, so I didn't bother cutting it down). 

Hemming the canvas was not the easiest task ever.  I purchased heavy thread and an upholstery needle for the sewing machine and bumbled through the first side before claiming defeat and requesting help from my oh-so-patient mother.


The additional two inches of material at the top and bottom was hemmed to create a small pocket that would eventually hold a dowel.  (The idea with the dowel was to add some structure and heft to the chart, though, after finishing it, I don't know that it was entirely necessary.)  I also gave the hems a quick coat of paint just to decrease the chance of them unraveling.

Once the canvas was ready to go, I laid it on the floor and began painting in the background. 

I should note here that I am NOT an artist.  In fact, other than walls, I have never painted anything  in my life.  I can't teach anyone technique or style or method or theory... I can just tell you how I went about this process.  The one thing that I CAN tell you unequivocally is that Brushes Matter.  The first set I got were crap and wound up leaving hairs in all of the paint.  Very annoying.

Using a wide flat brush dipped in water, I swirled pinks, blues and purples onto the canvas in varying degrees of opacity.  I added some pearl white in soft swirls for clouds, and then left the whole thing to dry.


Once the background was completely set,  I used a pencil and a ruler to carefully mark out the measurements on both edges.  I used a stencil for the numbers and only marked up to 5 feet.  Instead of using paint, I traced over the pencil measurements with a silver Sharpie.  It gave me a much neater line, and I like that the silver doesn't look too harsh against the rest of the pastels.


 Again, using light pencil strokes, I transferred the images from my sketch onto the canvas.
 

After that, the work became all about painting.  As I said, I'm not an artist, so the process was a bit of trial and error: a deep navy for the Eiffel Tower; lavender, slipper pink and sunny yellows for the flowers; vines of fresh green and brightly hued balloons... everything sweet and light and wonderfully girly.  


To do the lettering inside the scroll, I utilized a simple technique I've used for other projects.  I found a font that I liked online and enlarged and printed the words "Up, Up & Away."  I flipped the print out over and used the side of a pencil to shade a solid block over the back of the text. 

Then I flipped the printout back over, placed it where I wanted it on the scroll, and traced over the words with a ballpoint pen.  As I pressed down, the pencil on the back of the paper marked the canvas, and, once I was done, it was an easy job to remove the paper and paint in the outlined text. 


Once everything was completely dry, I added a few finishing touches.  I hot glued pink paper mache roses to one balloon and made a small flag banner out of washi tape and baker's twine for the other.   The Eiffel Tower got a wash of clear glitter paint as well as a stippled border, and I was going to leave at that...until I found strips of rhinestone adhesive.  I mean, I would have been a fool to pass that up. 


In my wanderings through the craft store, I also came across some tiny pieces of canvas stamped with French themes - I thought they'd be adorable as height markers (I'll use a fabric pen to write on the back the date and the exact height).  I actually kinda like that they have a old world charm but tone down the babyish-ness of the project.  I burned the edges a bit to underscore the vintage look and will eventually create a pocket on the back of the canvas to store the extra pieces.


I cut down a dowel to fit in both the top and bottom pocket of the canvas and stapled a satin ribbon to the wood in order to hang it.  Satin and gossamer bows were another last minute addition but they somehow make it feel more finished. 


Last but not least, I turned the project over and added a small, handwritten note: "No matter how big you get,  you'll always be my baby."  It seemed like an important reminder.

I have to say, I'm really pleased with how it turned out.  No, it's probably not the finest example of artistry, but it's something that took me a lot of time and effort to create.  It's something that can go from house to house with us.  Something that Annie can roll up and keep, even when she's too big for hot air balloons and glitter and rhinestones.  Maybe even something she can share with her little munchkin.  And hopefully, every time she looks at it, she'll know how very much she is loved.


Every year I swear that I'm going to make it simpler on myself - I'll skip the handwritten Christmas cards, nix the homemade cookies and pies and scale back on the decorations.  And every year I fail miserably at keeping that promise. 

The truth is, I get wrapped up in the season.  I enjoy doing those things.  And, while some people don't understand it, I truly love being busy.  If I'm honest, I think it has a lot to do with not having too much time to think.  But I digress. 

One of my "we'll see if I get to it" projects this year was a centerpiece for our Christmas Eve and Christmas festivities and a properly laid table.  While I love arranging flowers, they take some serious time and large chunks are hard to cut out with the Little Bee attempting to eat her way through the living room (Ironically, she still won't eat food...).  And digging out and hauling up seasonal dishes, napkin rings, drinkware (etc) seemed a little daunting as well.

But, true to form, I got the itch today and, while my husband watched Chompers the Red Cheeked Reindeer, I pulled together a beautiful floral centerpiece and tablescape.  Below are pics of the results. 


I have to say, while I realize it was completely unnecessary, I'm glad that I was able to find some time to do this stuff.  Creating things is such a mood lifter and the result makes me feel a little closer to the magic. 

Well, I'm off to go scrape some of this Christmas ornament glitter off.  I look like I exfoliated with a pixie.

Meanwhile, I pray you have a beautiful holiday filled with family, friends, delicious food and an overabundance of grace and laughter.  :)

Merry Christmas, friends!


I've been a little obsessed with throw pillows lately.  It started because I kinda dislike my current pillows.  Alright, seriously dislike.  Okay, occasionally I have the urge to see if they fit in the garbage disposal.  I picture Scott coming home to find me surrounded by shreds of fabric and fluff and laughing maniacally.  Yeah, it's that bad. 

Initially, my search for replacements was very casual - I'd glance around at my favorite stores or websites to see what was out there.  But the more I looked, the more I found myself in a state of shock at the cost (I mean, $45 - $80 for one pillow?! That's crazy talk!)  Slowly my search began to ramp up until I found myself scouring websites, sales and clearance racks looking for anything remotely attractive that I could afford.  As I lamented to my ever-so-patient husband over the fact that the simple cost of materials couldn't possibly justify the prices, he stopped me in my tracks with his annoyingly logical question "Then why don't you make them?" 

Yeah, okay, that makes sense.  But it also means that I have to, you know, sew.  
 
I hate sewing.  Alright, "hate" might be too strong a word. But measuring, cutting, pinning, stitching, hemming... urgh.  Let's just say that if we still lived in a time where we had to make our own clothes, I'd probably be wearing paper bags, grain sacks and pipe cleaners, lovingly held together by gobs of paste and bubblegum. 

Never one to shy from a challenge, however, I have assigned myself the task of finding ways to create pillows that I like without spending an arm and a leg (and to do it without stressing my oh-so-limited sewing capabilities).  And so far, I'm pleased with the results.


This weekend, I started with a simple method that turned out really really well: Placemat pillows.  

Placemats already have the size, shape and majority of sewing done for you.  In addition, the fabric is usually meant to withstand a little wear and tear which is perfect for sofas like mine, where the pillows are for more than just show.  

After a quick search, I found and purchased a couple of beautiful printed placemats at Target for $3.99 each.

I love the graphic print and the gorgeous colors!
Using a seam ripper, I tore the seam out of a 4 inch section, separating the plain backing from the printed front.

 
The next step was to carefully pack stuffing into the area, leaving a tiny bit of air space for proper arm-propping squish.  I had a bag of stuffing on hand that I supplemented with, but I actually started by deconstructing an old pillow and transferring its innards to the new pillow (waste not...).


Finally, I used my sewing machine (gasp!) to reseal the four inch hole with a straight seam.  Sealing them up by hand might have actually yielded slightly straighter lines, but I personally feel more confident in the strength of the machine stitch. 


The results?  A pair of beautiful accent pillows for $4 each.  Love!


The challenge as I progress is going to be not only finding new ways to make and embellish beautiful pillows, but also to coordinate fabrics and styles while using different sources.  Keep your fingers crossed and I'll keep you updated with all of the wins and losses!


I've been in a bit of a decorating rut lately.  It's not that there aren't plenty of things in my house that I'd love to change, but I've been suffering from a lack of drive.  Part of it is that, as I've said before, we rent our townhome and that limits what I can really do.  For example, I'd love to create built in shelving, mount our TV, install crown moulding, relocate outlets, replace light fixtures (etc) but that would mean sinking a lot of money and time into something we'd have to tear out and put back later (not to mention several of those things wouldn't be approved).   But more than just the limitations of renting, I've simply lacked vision.  I walk into my living room/dining room/bedroom/bath with every intention of making changes, and then, like a dolt, just sit there staring at the walls and feeling very blah about the whole thing.  Sometimes, however, all it takes is one little thing to light the spark.

Enter Home Decorators Collection.  I really like their stuff.  A little preppy, a little modern, and most of all, classic, I often find myself trawling through their website and going on an imaginary shopping spree ("I'll take that, and I'll take that, and Oooo! I definitely need that...").  Alas, I can't always afford all of the gorgeous items I've collected in my immaterial cart.  Apparently I need an imaginary sugar daddy.

The other day, however, Home Decorators was having a fantastic sale that offered an additional 20% off of all of their clearance and sale items.  Without much intent, I began scrolling through and EUREKA! I fell in love with a distressed gold sunburst mirror.  With the extra discount, the price dropped over $50 and a coupon code for free shipping made it a deliciously satisfying purchase.

Source
Initially, I had every intention of replacing the buffet mirror in the dining room, but when it got here,  I kept wandering back into the living room with it and gazing at the space over the fireplace.  That wall has been a headache for me since we moved here.  I've never LOVED anything I've had up there, but I've also never had any brilliant ideas as to what to do to make it better.  Until now.

Okay, it's not terrible, but simply calling it 'uninspired' is generous.
Like I said, sometimes all it takes is just one little thing.

As soon as I made the decision to abandon the dining room and put the mirror up in the living room, I started seeing the changes I wanted to make.

I got rid of the framed print that had just been resting on top of the fireplace (I like it, but I've never loved it in that spot. Hence, my reluctance to actually mount it) as well as the two framed ironwork pieces that flanked it.


The hatbox full of flowers and pretty little bird that have lived on my mantle since Easter (don't judge me) got pulled as well.


Once I had a blank slate, I attached the new mirror and instantly fell in love.  The size was perfect, the shape added visual interest and the style gave the room the little pop of trendy and modern that it needed.

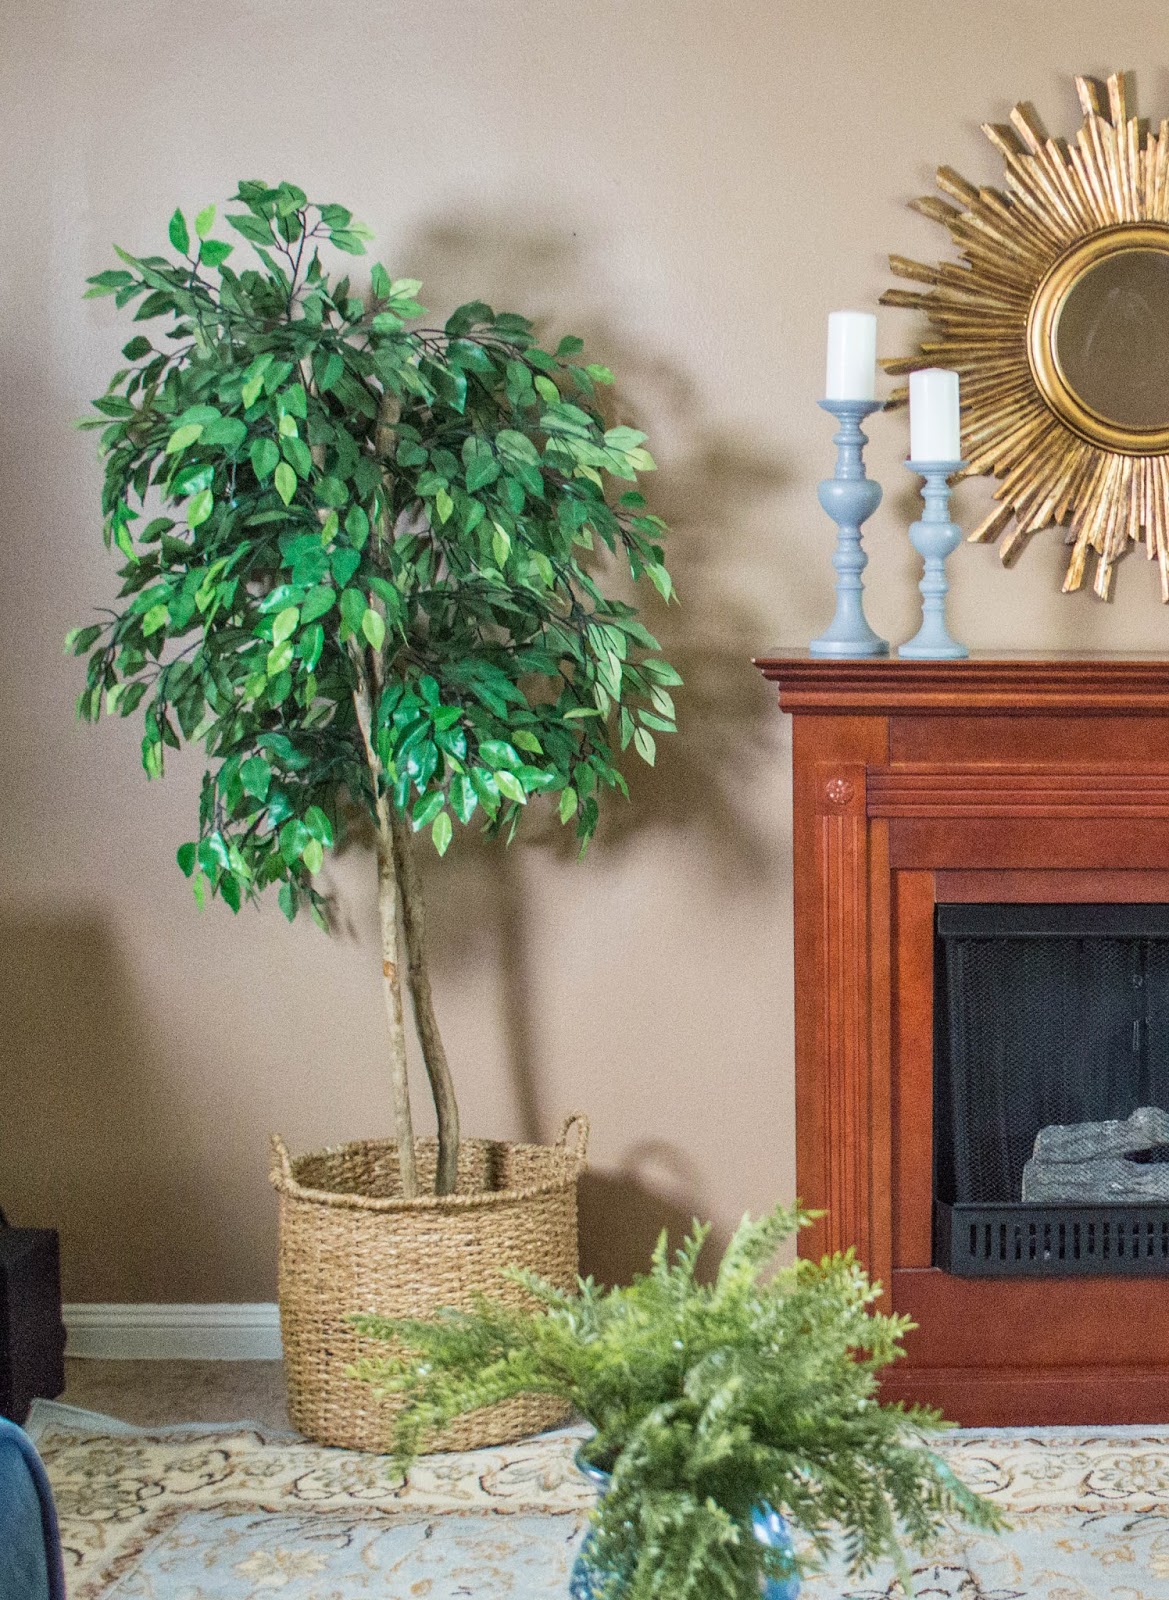
I had purchased some bright aqua candlesticks at a Ross store (for around $6 each) that had been awaiting a makeover (aqua is great, but not exactly my style. I loved the shape though).  I gave them a few fresh coats of grey glossy spray paint and, once dry, topped them with white pillar candles and placed them to the left of the mirror.


A wild grass plant was transferred to a large, funky blue and gold pot and placed to the right.


Once that was done, I needed to address the large empty wall spaces alongside the fireplace that have been the bane of my living room decorating since we moved in.  The left side was outfitted with a ficus tree to balance out the green grass on the right of the mantle.  For some additional texture and proportion I placed it in an over-sized seagrass basket. 


That left only the right side to figure out.  Ditching the small gold mirror that was tucked awkwardly in the corner (hey, we all make decorating missteps from time to time), I stole two botanical prints from the upstairs bathroom and stacked them on the wall to fill the tall narrow space between the fireplace and sofa.  ]

One of my favorite decorating shortcuts is using Command Picture Hanging Strips.  So easy to put up and so easy to remove!

And the results?  So. Much. Better.
 
There are still changes I would love to make (recovering the throw pillows, a new end table, colorful curtains) but I can't tell you how much I'm loving these.  The room feels so much more pulled together, and less like an afterthought.  Amazing what one piece of decor can do!

Now, it's on to the other lack luster rooms to see what small changes I can make there.  Stay tuned!


Powered by Blogger.